To compose a new message, click [New Message] in the tool icons.

To compose a plain text message
New Message Window
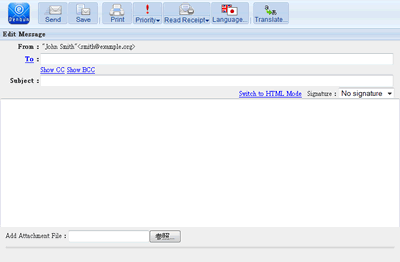
Enter the detail of the message. You can enter the following items.
|
From
|
The E-mail address you specify in the [Account] will be displayed.
|
|
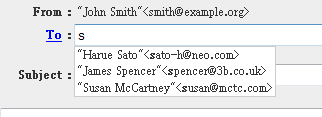
To
|
Enter the E-mail addresses you want to send the message.
To enter more than one address, use "," to separate addresses.
You can add addresses up to 256.
It is possible to specify addresses for "To" "Cc" "Bcc" up to 256 respectively.
If you specify a group, the message is sent to E-mail addresses in the group.
If you specify a group in the address book, the message is sent to the contacts' E-mail address in [E-mail] field on the General tab.
|
|
Cc
|
Enter the E-mail addresses if you want to copy the message to other people too. To enter more than one address, use "," to separate addresses.
|
|
Bcc
|
Enter the E-mail addresses if you want to send the message to people without each of them seeing who the other recipients are.
To enter more than one address, use "," to separate addresses.
* The recipients who are specified in [To] and [Cc] cannot see the E-mail addresses you specified in the [Bcc].
|
|
Priority
|
You can select the priority of the message.
|
|
Request Read Receipt
|
Choose whether you wish to request read receipt to the recipients.
To request read receipt, choose [Request Read Receipt] from [Tools] menu.
|
|
Subject
|
Enter the subject of the message.
|
|
Message body
|
Enter the message body.
(You can compose a message in plain text or HTML format)
* You can compose HTML messages if your administrator allows users to compose HTML messages in [Allow to compose HTML formatted messages] by the management tool.
You cannot compose HTML messages if the administrator chooses "Do not allow".
|
|
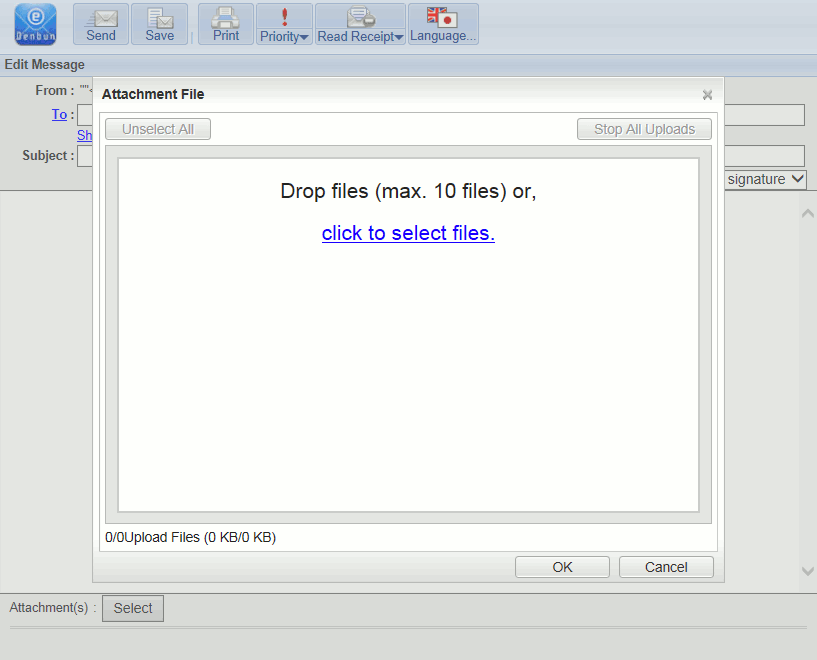
Attachment
|
You can attach files to the message.
|
|
Signature
|
If you have created signature(s), you can choose a signature. The selected signature will be added at the end of the message when sending.
|
You can use "Auto Complete" feature when entering [To], [Cc], [Bcc].
Click [Send] button to send the message.

Drag & Drop attachment files
If you choose [Enable] in [Preferences]-[Enable Drag & Drop files] and the browser is Internet Explorer, you can use Drag & Drop to attach files. (It cannot use in V3.3I R2.1. )
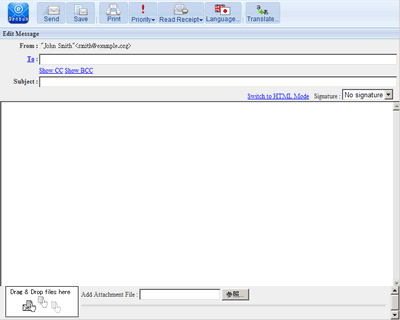
you can use Drag & Drop to attach files. (It can use in V3.3I R2.1. )
* It does not operate in IE8 and IE9.
* Flash Player needs to be installed using this function.
To select E-mail addresses from Address Book
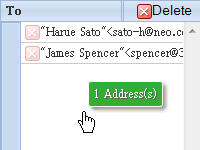
You can also select E-mail addresses from Address Book by clicking [To], [Cc], [Bcc] button.

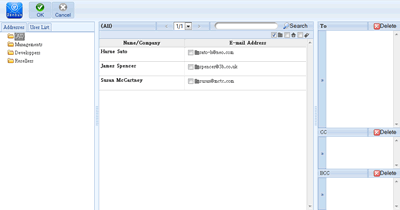
You can drag a group, address, or E-mail address and drop it on [To], [Cc], or [Bcc].
You can search in the directory service if the service is added by using management tool.
To compose an HTML message
Click Switch to HTML Mode link.

Enter the detail of the message. You can format the messages using the commands below.
 ... ... |
You can change text color.
Choose the color from the pull down menu. |
 ... ... |
You can make text bold.
Select the text and click "Bold" to make the text bold.
|
 ... ... |
You can make text italic.
Select the text and click "Italic" to make the text italic.
|
 ... ... |
You can underline text.
Select the text and click "Underline" to underline the text.
|
 ... ... |
You can insert a horizontal line.
Select the insertion point and click "Horizontal Line" to insert the horizontal line. |
 ... ... |
You can align text left.
Select the text and choose "Align Left" to align the text left.
|
 ... ... |
You can align text center.
Select the text and choose "Align Center" to align the text center.
|
 ... ... |
You can align text right.
Select the text and choose "Align Right" to align the text right.
|
 ... ... |
You can create a hyperlink.
Select the text and click "Hyperlink".
On the dialog, enter URL and click [Ok].
|
 ... ... |
You can cancel a hyperlink.
Select the text a hyperlink is assigned and click the button to cancel the hyperlink.
|
 ... ... |
It will return the changes to the original.
It returns the changes made in the last operation to the original.
|
 ... ... |
We will repeat the change.
If you undo the change and try the change again.
|