Denbun POP version Manual
User's Manual | Administrator's Manual | Installation Guide | Initial Settings Guide
Back to Menu
 

Initial Settings Guide

After the installation, please access to "Denbun Management Tool" in order to setup Denbun.   
1. Access Denbun Management Tool
After the installation, access to "Denbun Management Tool"
e.g. for Windows version
http://Server Name (*1)/scripts/dnpwml/dnpwmlconfig.exe?
e.g. for Linux version
http://Server Name (*1)/cgi-bin/dnpwml/dnpwmlconfig.cgi?

Login
Just after the installation, enter "admin" in the password.

Login ad admin
Click [Password Settings] in the menu.
2. Set the password
Enter the password you use to login to this tool (Denbun Management Tool)

Password Settings
Enter the password and click "OK" to save the password. Next, click [Mail Server Settings].
3. Setup the mail server settings
You can setup the mail server settings.

Mail Server Settings
* The setting up mail server settings is not mandatory. However if your users use a common settings, you can set up the settings here.

Setup POP3
Setup the POP3 server to receive messages.
Enter the name or IP address of server.If the Port No. is other than 110 (default), change the number. The default setting for secure connection can be used in most cases. (If sending a message is failed, please ask your administrator about the settings)

Setup SMPT
Setup the POP3 server to send messages.
Enter the name or IP address of server. If an error occurred when sending ask your administrator.

Setup Authentication for Sending
You can setup the authentication method. Denbun supports SMTP authentication and POP before SMTP authentication.
Click "OK" to save the changes. Next, please create users.
4. Create Users
Create users who use Denbun. The users you created can use Denbun.
Click User List.

Create New User
To create new user, click "Create New User" button.

Enter user Information
* Login ID and password are required to login to Denbun from the client.
* Grant Rights of Public Address
  • Create Public Contacts: If you grant the right of the public address, the user can add, edit, move and delete the public contacts.
  • Create Public Folders: If you grant the right of the public address, the user can add, edit, move and delete the public folders.

The user information you entered here will be displayed in the User List in Address Book.

Click "OK" to save the changes. Next, please create accounts.
5. Create Accounts
Click [Account Settings] in the user list.

Create New Account
The account list will be displayed.

Account List
To create new account, click "Create New Account" button.

Enter account information
After entering the necessary information, click "OK" button to save the changes. You are now ready to access Denbun.

Open your web browser and access to Denbun.
6. Access from Client
e.g. for Windows version
http://Server Name (*1)/scripts/dnpwml/dnpwmljs.exe?
e.g. for Linux version
http://Server Name (*1)/cgi-bin/dnpwml/dnpwmljs.cgi?
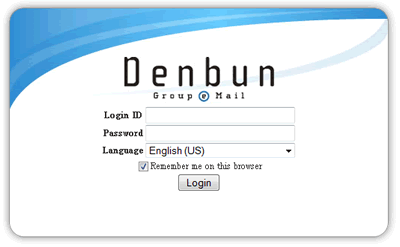
Access from Client
When you get the login screen, please enter the Login ID and password you created and click "Login" button.

*1 Server Name
IP address of server or computer name on which Denbun is installed.
* For example, in case of IP address
http://192.168.1.1/scripts/dnpwml/dnpwmlconfig.exe?
* For example, in case of computer name
http://hogehoge/scripts/dnpwml/dnpwmlconfig.exe?

* In Windows version, to find the IP address or computer name on which Denbun is installed, start the command prompt on the computer and use "ipconfig" command.
In Linux version, use "/sbin/ifconfig" command to find the IP address of your server.

Executing the command:
C:\Documents and Settings>ipconfig /all

In the output result;
"ServerName" in "Host Name . . :ServerName" is the computer name.
"IP Address " in "IP Address. . :IP Address " is the IP address.
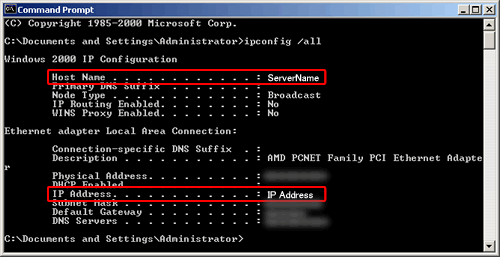
Command Prompt
* You must have a web server to use Denbun.

If you cannot access to Denbun after the installation, no web server might be installed on your computer.

If a web server is installed and you cannot access to Denbun, please contact us on our web site.


Copyright (C) NEOJAPAN Inc. All Rights Reserved.