| User's Manual | Administrator's Manual | Installation Guide | Initial Settings Guide |
Setting up Windows Server 2008 before the Installation
This guide explains how to setup Windows Server 2008 in order to use Denbun.
When you install Windows Server 2008, if you configure the application server, Internet Information Server 7 is installed.
In the default settings of Internet Information Server 7, executing CGI program is restricted and no directory for CGI programs provided. Therefore, you have to configure the environment for executing CGI programs.
This guide shows you minimum settings in order to use Denbun. Please setup and configure your server according to your security policy.
1. Install Internet Information Server 7
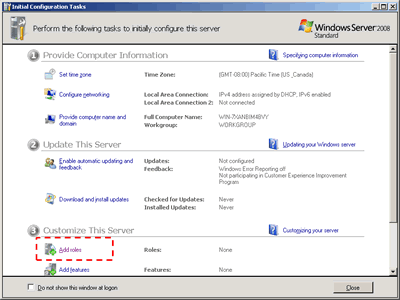
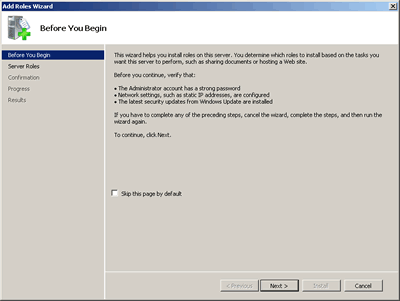
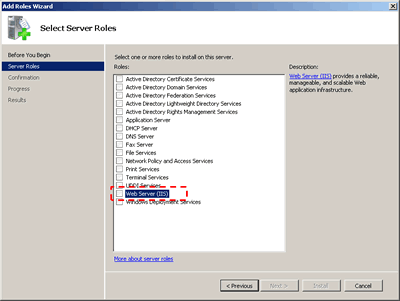
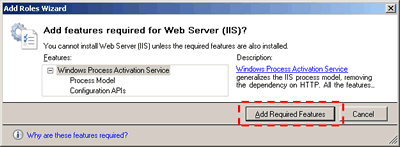
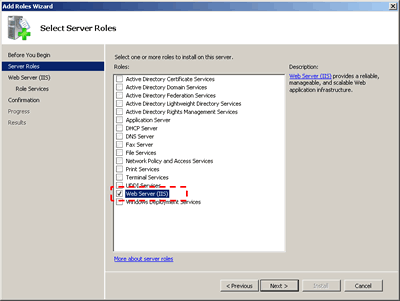
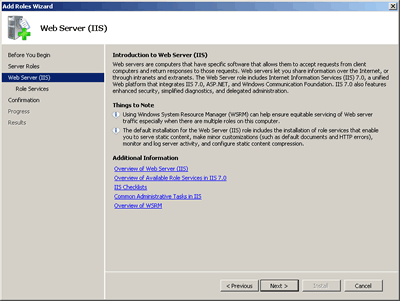
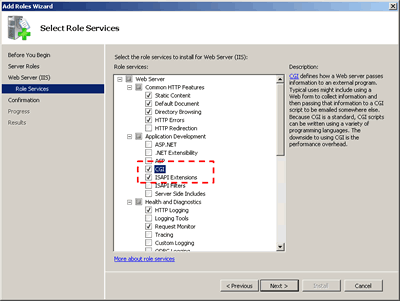
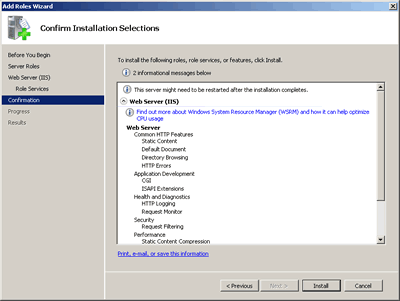
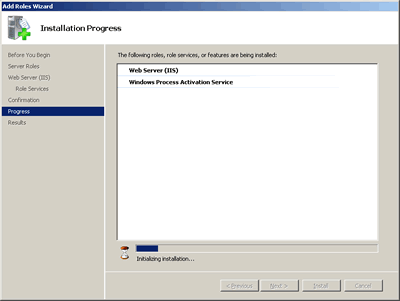
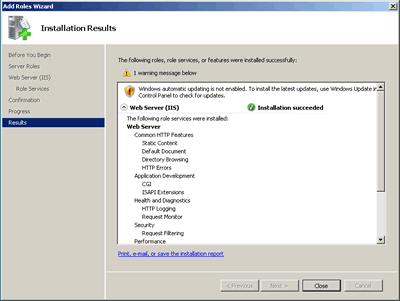
Install IIS.
2. Create a Directory and Set Necessary Permission
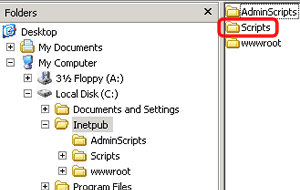
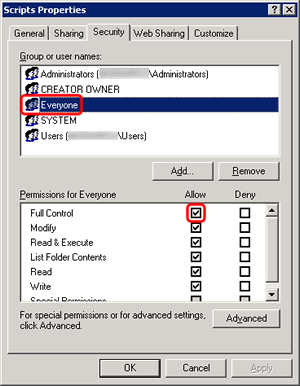
Create a directory for the destination directory of Denbun and set the permission required for executing CGI programs.
3. Create a Virtual Directory for Executing CGI Programs
Configure CGI settings and the folder for CGI by using the server manager.
| 3-1. | When Internet Information Services 7 is installed, [Server Manager] is displayed. Choose [Roles]-[Web Server (IIS)]-[Internet Information Services]. In the right view of the server manager, [Internet Information Services (IIS) Manager] is displayed. In [Home], open ISAPI and CGI Restrictions. 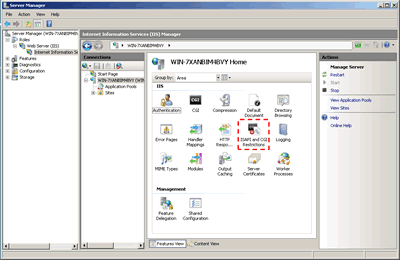 |
| 3-2. | When ISAPI and CGI Restrictions screen is displayed, click [Edit Feature Settings] from the menu in the right side of the screen.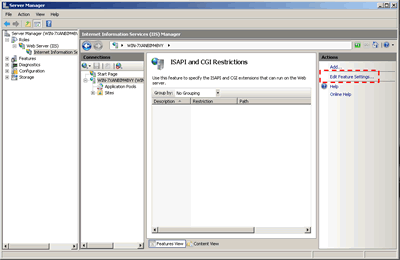 |
| 3-3. | [Edit ISAPI and CGI Restrictions Settings] dialog is displayed. Check; Allow unspecified CGI modules Allow unspecified ISAPI modules and click [OK] button. 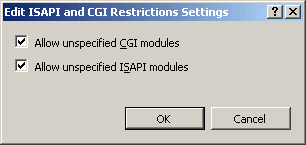 |
| 3-4. | In the site tree, right-click on [Default Web Site] to display the popup menu, and choose [Add Application].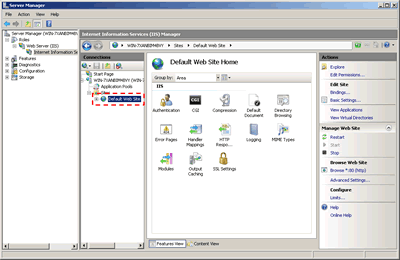 |
| 3-5. | The [Add Application] screen is displayed. Enter "scripts" in the Alias field and specify "C:\Inetpub\Scripts". Click [OK] button when you complete the entry.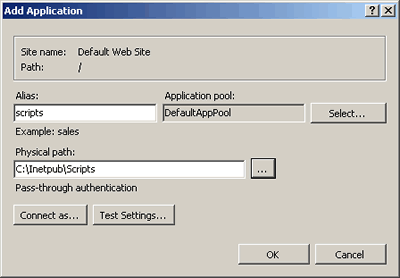 |
| 3-6. | Choose "script" alias you created and run [Handler Mappings]. Click [Edit Feature Permissions] form the menu on the right hand side of the screen. 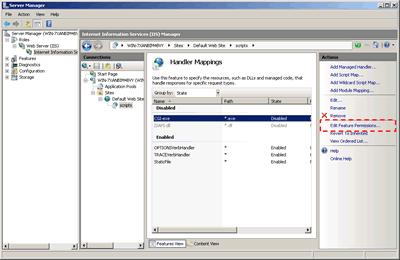 |
| 3-7. | On [Edit Feature Permissions] screen, uncheck [Read] and check [Execute]. * You can prevent direct access to the files in the Denbun directory from browsers by unchecking [Read] option. 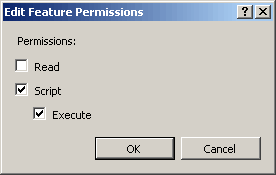 |
4. Using Denbun
| 4-1. | After complete the installation of IIS, install Denbun. -> Please refer this guide for how to install Denbun. |
| 4-2. | After complete the installation of Denbun, access to Denbun. If the login screen is displayed and you can login to Denbun, the installation is completed normally. 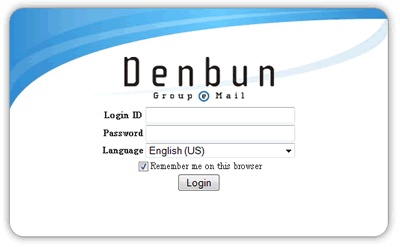 |
|
Copyright (C) NEOJAPAN Inc. All Rights Reserved. |
